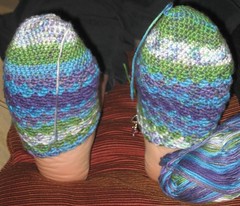
They looked like little hats, and my husband and I were putting them on our stuffed animals and such. Finally, I put them on my feet and decided they were "Foot Hats," and couldn't stop laughing about it. Yes, we are that silly. (Or possibly even sillier than that silly.) The socks look a lot less like hats now and a lot more like socks, but the name has stuck!
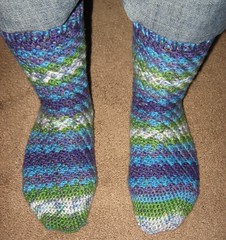
Finished "Foot Hats" on my feet:
I had a heck of a time with this pattern. The beginning part was very hard, and I wound up frogging quite a few times, but I finally figured out what the pattern meant. (Or at least, I think I did. There's no way to really know, since the photos in the book aren't very clear.) Also, luckily for me, I figured out almost right away that they were coming out too big. I had to start over with a D hook instead of the recommended E.
The body of the sock is a very easy shell pattern, and lots of fun, especially with colorful yarn like the Deborah Norville Serenity Garden yarn that I used. By the time I got to the heel, I was feeling pretty confident. Then I tried making the heel...and felt significantly less confident. I blame this partially on the fact that there are no diagrams or pictures in the booklet of what the heel should look like. Even when I eventually got it right, I was very confused. It comes to a point on either side of the heel, which, to someone like me who's used to manufactured socks, is really weird-looking! Thankfully, the socks fit well. If they were even a little too big, I think the heel would be very awkward.
If you want to try this pattern, make sure you take note of the instructions under heel rows 2-13 where it says "Place stitch marker in ends of rows 13, 11, 9, 7, 5, 3 and in base of row 1 on each side of Heel." I missed this the first time around. The next time, and many times after it, I was completely befuddled by where the markers were supposed to go.
After I figured that out, the heels still proved difficult. You're supposed to single crochet in each of the marked stitches, but as there's no diagram, I didn't really know how to do that and had to sort of wing it. I'm not used to crocheting in stitches that aren't "normal" crochet stitches. I've rarely even crocheted around borders or anything like that. I did get some helpful information from Janet Rehfeldt's Crocheted Socks book, without which I probably wouldn't have felt like I had even the slightest clue of what I was doing.
And now, I'll complain some more about the pattern. ;) For the leg part of the pattern, the first round simply says to "evenly space" a certain number of the aforementioned shell stitches around the foot and heel. To me, this is a cop-out. It says, "Go ahead, you do the math because we didn't want to." Um, there's a good reason I've never written a crochet pattern or done anything in crochet without a pattern written by someone else: I am not a math genius. Sure, I'm pretty good at math, but figuring out how to evenly space those stitches was a challenge. Crocheting these socks was difficult enough without having to do that. I wish the authors had done the calculations for us and maybe even put in some diagrams. The sizes are a straightforward S, M, and L. I'm sure it would've have taken all that much effort for an experienced crochet designer to do that--or at least, nowhere near as much effort as it takes someone like me.
All that said, however, I LOVE my Foot Hats and would consider using this pattern again sometime because the finished product is so beautiful. I just want my fellow crocheters to be warned about the problems I had, so maybe they can get it right in a few less tries than I did.
No comments:
Post a Comment